Chainlit: an easy way to interact with LLMs
In this section, we’ll demonstrate the process of engaging with an open-source language model of your choice available on the Hugging Face model hub. To facilitate this interaction, we’ll leverage the Chainlit library—an open-source asynchronous Python framework designed to expedite the creation of applications akin to ChatGPT. This library enables seamless interaction with models through an automatically generated user interface. For more detailed insights into Chainlit and its functionalities, further information is available here.
Note
There is a video tutorial available for this section watch it.
Prerequisites
To get started, we’ll need to install the Chainlit library and other dependencies. To do so, we’ll create a new virtual environment using the following command:
# using python
python3 -m venv chainlit_env

# using anaconda
conda create -n chainlit_env python=3.11
Next, we’ll activate the virtual environment and install the necessary dependencies
# activate the virtual environment
# using python
source chainlit_env/bin/activate

# using anaconda
conda activate chainlit_env

# install the dependencies
pip install chainlit
pip install ctransformers
pip install langchain
pip install torch
Downloading the model
The models that we need to download from Hugging Face Hub should be in the GGUF format. In this link you can find the Mistral model in this format, download the model that has this name mistral-7b-instruct-v0.1.Q4_K_S.gguf because we will need it for the rest of this tutorial. If you want to use another llm just search for it in one of TheBloke’s repositories.

The Mistral-7B-Instruct-v0.1-GGUF model repository.
The interface
Now let’s create a new file called app.py and import the necessary libraries:
import os
import chainlit as cl
from chainlit.input_widget import Slider, Switch
from langchain.chains import LLMChain
from langchain.llms import CTransformers
from langchain.prompts import PromptTemplate
Now we’ll create a variable to store the path to the model we downloaded earlier:
local_llm = "./mistral-7b-instruct-v0.1.Q4_K_S.gguf" # download the model from this link https://huggingface.co/TheBloke/Mistral-7B-Instruct-v0.1-GGUF/tree/main
Next we’ll create a configuration dictionary to store the parameters that we’ll use to initialize our model:
config = {
    'max_new_tokens': 128,
    'repetition_penalty': 1.1,
    'temperature': 0.5,
    'top_p': 0.9,
    'top_k': 50,
    'stream': True,
    'threads': int(os.cpu_count() / 2),
}
The values in this dictionary are the default values for the parameters that we’ll use to initialize our model. For more information on these parameters, please refer to the CTransformers documentation.
In the interface we’ll use the Slider and Switch widgets to allow the user to adjust these parameters. To do so, we’ll use Chainlit’s ChatSettings class as follows:
settings = await cl.ChatSettings(
    [
        Slider(
            id="Temperature",
            label="Temperature",
            initial=config['temperature'],
            min=0,
            max=2,
            step=0.1,
        ),
        Slider(
            id="Repetition Penalty",
            label="Repetition Penalty",
            initial=config['repetition_penalty'],
            min=0,
            max=2,
            step=0.1,
        ),
        Slider(
            id="Top P",
            label="Top P",
            initial=config['top_p'],
            min=0,
            max=1,
            step=0.1,
        ),
        Slider(
            id="Top K",
            label="Top K",
            initial=config['top_k'],
            min=0,
            max=100,
            step=1,
        ),
        Slider(
            id="Max New Tokens",
            label="Max New Tokens",
            initial=config['max_new_tokens'],
            min=0,
            max=1024,
            step=1,
        ),
        Switch(id="Streaming", label="Stream Tokens", initial=True),
    ]
).send()
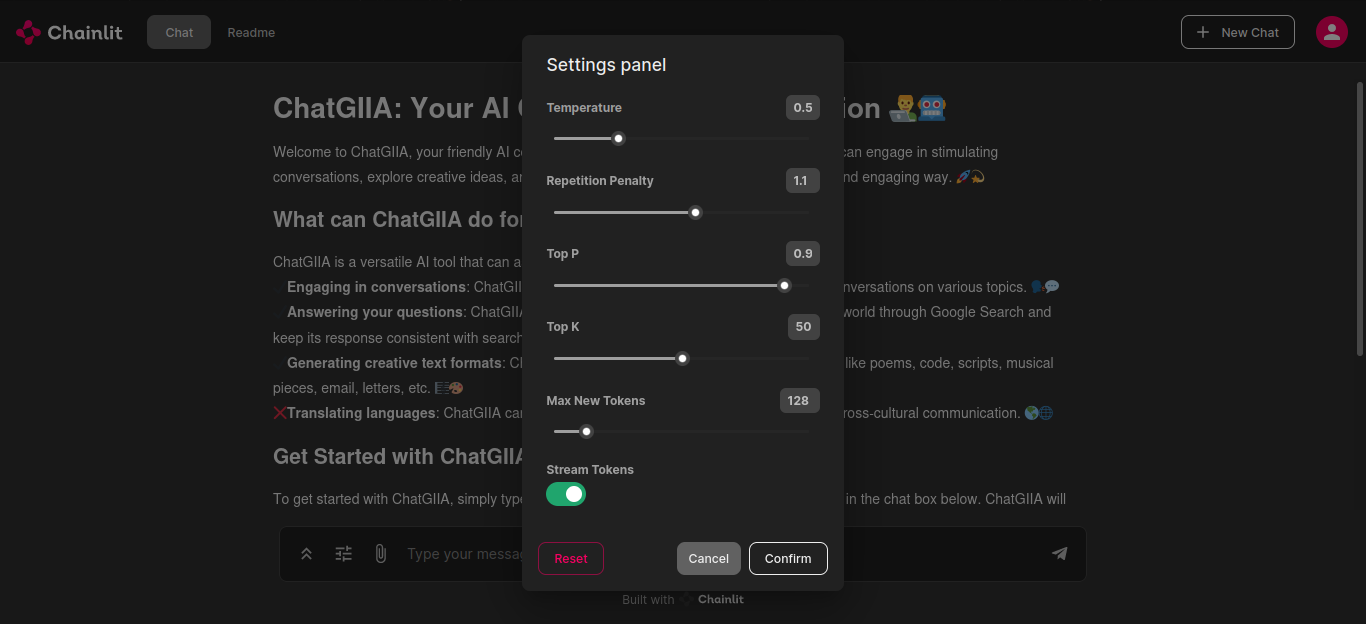
The settings panel.
Now whenever the user changes one of these parameters, we need to setup the model to use the new values. To do so, we’ll create a function called setup_agent that will update the values in the config dictionary as well as applying it to the model:
def setup_agent(settings):
    # update the config dictionary with the new settings
    config['temperature'] = settings['Temperature']
    config['repetition_penalty'] = settings['Repetition Penalty']
    config['top_p'] = settings['Top P']
    config['top_k'] = settings['Top K']
    config['max_new_tokens'] = settings['Max New Tokens']
    config['stream'] = settings['Streaming']

    # update the model with the new settings
    llm_init = CTransformers(
        model=local_llm,
        model_type="mistral",
        lib="avx2",  # 'avx2' or 'avx512'
        **config
    )

    # creating the prompt template
    template = """
    Question: {question}
    Answer:
    """

    prompt = PromptTemplate(template=template, input_variables=['question'])

    # creating the llm chain
    llm_chain = LLMChain(prompt=prompt, llm=llm_init, verbose=False)

    # saving the llm chain in the session
    cl.user_session.set('llm_chain', llm_chain)
In the setup_agent function, we have created a PromptTemplate object that will be used to generate the prompt that we’ll feed to the model. This object takes a template string and a list of input variables. The template string is a string that contains the text that we want to feed to the model. The input variables are the variables that we want to replace in the template string. In our case, we want to replace the {question} variable with the question that the user will ask. For more information on the PromptTemplate class, please refer to the LangChain documentation.
After that, we have created an LLMChain object that will be used to interact with the model. This object takes a PromptTemplate object and an LLM object. For more information on the LLMChain class, please refer to the LangChain documentation.
Finally, we have saved the LLMChain object in the user session so that we can access it later. For more information on the user session, please refer to the Chainlit documentation.
The setup_agent will be called whenever the user changes one of the parameters in the interface. To do so, we’ll use the cl.on_settings_update decorator as follows:
@cl.on_chat_start
async def start():
    settings = await cl.ChatSettings(...)

    # calling the setup_agent function
    await setup_agent(settings)


@cl.on_settings_update
async def setup_agent(settings):
    # the content of the setup_agent function
Now, we are ready to start the chat. To do so, we’ll use the cl.on_message decorator as follows:
@cl.on_message
async def main(message):
    # getting the llm chain from the session
    llm_chain = cl.user_session.get('llm_chain')

    # generating the response
    result = await llm_chain.acall(message.content, callbacks=[cl.AsyncLangchainCallbackHandler()])

    # sending the response
    await cl.Message(content=result["text"]).send()
In the main function, we have retrieved the LLMChain object from the user session and used it to generate the response. The acall method takes the user input and a list of callbacks. The AsyncLangchainCallbackHandler is a callback that is used to handle the asynchronous calls to the model. For more information on the LangChain Callback Handler, please refer to the Chainlit documentation.
Finally, we have sent the response to the user using the cl.Message class. For more information on the Message class, please refer to the Chainlit documentation.
Running the interface
To run the interface, we’ll use the following command:
chainlit run app.py -w
After running the command, you should see something like this:

The interface once loaded.
To change the content that appears in the interface once running the command, you can edit the chainlit.md file